
doc:dev_setupfirmware
This is an old revision of the document!
Table of Contents
OOBD-Firmware Development Environment
Kubuntu for VirtualBox with IDE Eclipse and Sourcery ARM Toolchain
Download software
- Get latest version of Kubuntu (here: 13.04) http://www.kubuntu.org/getkubuntu
- Get latest version of Virtualbox (here: 4.2.12 for Windows hosts, tested on Windows 7, 64bit) https://www.virtualbox.org/wiki/Downloads
- Get latest Oracle VM VirtualBox Extension Pack (here: 4.2.12) http://dlc.sun.com.edgesuite.net/virtualbox/4.2.12/Oracle_VM_VirtualBox_Extension_Pack-4.2.12.vbox-extpack
Virtualbox installation on Windows Host
Start “Virtual - box” on Windows host: Start ⇒ Oracle VM VirtualBox ⇒ Oracle VM VirtualBox
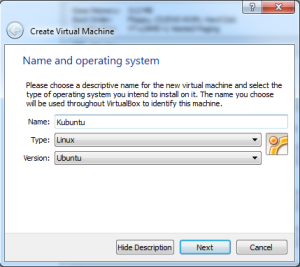
- Create new virtual machine:
New or Ctrl-N
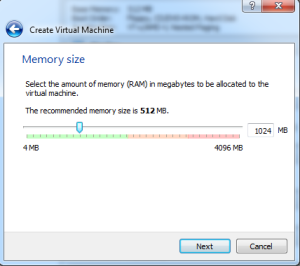
Press “Next” - Memory size (here: 1024MB)
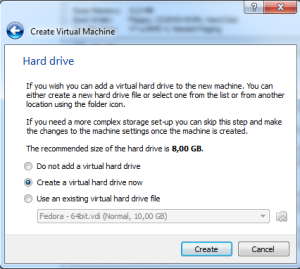
Press “Next” - Create a virtual hard drive now
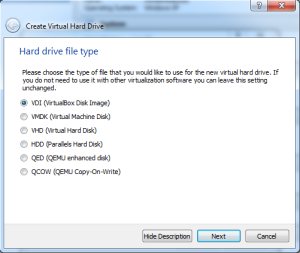
Press “Create” - Hard drive file type (here: VDI – VirtualBox Disc Image)
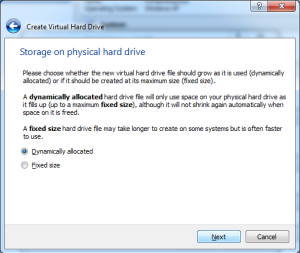
Press “Next” - Storage on physical hard drive (here: Dynamically allocated)
Press “Next” - Select file location and size (here: 8GB Disc Image)

Press “Create” - New created virtual machine is ready for initial start now
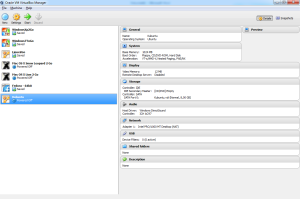
Highlight “Kubuntu” and double mouse click now to start new virtual machine “Kubuntu”! - Insert Kubuntu 13.04 CD in CD-ROM of Laptop/PC
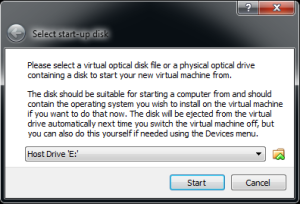
Press “Start” - Kubuntu Start-Screen after booting Virtualmachine from CD
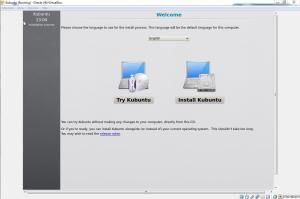
Select language and Press “Install Kubuntu” - Start installation
Select “Install this third-party software” and “Download updates while installing”
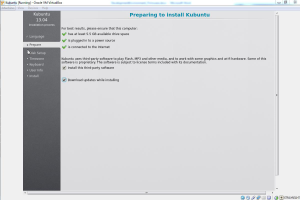
Press “continue” - Choose installation type (here: use entire disk)
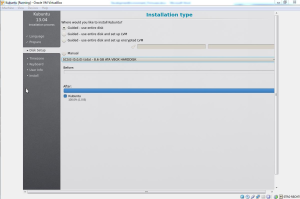
Press “Install now” - Confirm Timezone during installation process
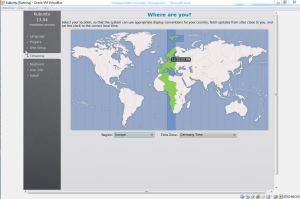
Press “Continue” - Select you Keyboard layout (here: German)
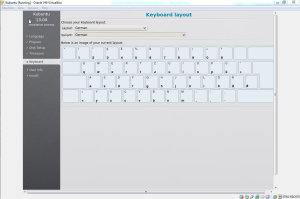
Press “Continue” - Fill-In user data
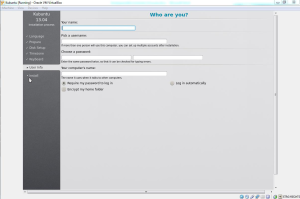
Press “Continue” - After finishing installation restart Virtual machine by pressing “Restart Now”
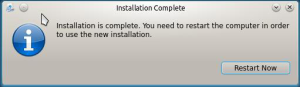
Hint:
CD is ejected automatically after shutting down and restart! - After restart and login the KDE desktop is shown:
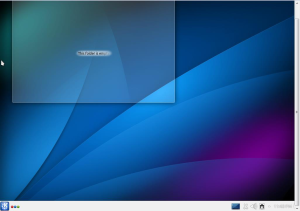


Install Eclipse-CDT with Muon Package Manager
- KDE ⇒ Applications ⇒ System ⇒ Muon Package Manager
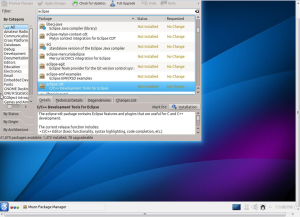
Press “Installation”
Hint:
“Mark Addition changes?” ⇒ Press “OK”
Press “Apply Changes” on the top and enter your user password
Hint:
A working Internet connection is necessary now otherwise the installation will fail. - Install Subversion with Muon Package Manager
- KDE ⇒ Applications ⇒ System ⇒ Muon Package Manager
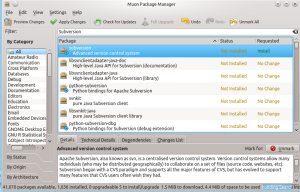
- Type Subversion in search bar
- Highlight subversion and right click on subversion ⇒ Mark for installation ⇒ Apply changes


Installation procedure of Sourcery G++ Lite Edition for ARM EABI
- Start Webbrowser (i.e. Firefox from KDE ⇒ All Applications ⇒ Internet) and get Sourcery CodeBench Lite Edition for ARM EABI – ARM crosscompiler
Please download the latest Sourcery G++ Lite version and NOT any “CodeBench” version, i.e.:
Release Date 2011-05-02 - Sourcery G++ Lite 2011.03-42
https://sourcery.mentor.com/GNUToolchain/release1802
Release Date 2010-11-10 - Sourcery G++ Lite 2010.09-51
https://sourcery.mentor.com/GNUToolchain/release1592
Hint:
Don’t use the newer CodeBench version as they won’t work out of the box, i.e.:
Release Date 2013-05-07 - Sourcery CodeBench Lite 2013.05-23
https://sourcery.mentor.com/GNUToolchain/release2449
Release Date 2011-12-19 - Sourcery CodeBench Lite 2011.09-69
https://sourcery.mentor.com/GNUToolchain/release2032
Hint:
Target OS…
EABI ⇒ IA32 GNU/Linux Installer
… and NOT…
GNU/Linux - Install Sourcery CodeBench Lite Edition for ARM EABI by start Terminal
KDE ⇒ All applications ⇒ System ⇒ Terminal
<hostname>:~$ cd Downloads/
<hostname>:~/Downloads$ chmod 755 arm-2011.03-42-arm-none-eabi.bin
<hostname>:~/Downloads$ sudo dpkg-reconfigure –plow dash
Configuring dash ⇒ Select “No”
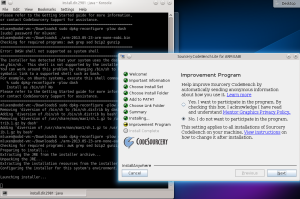
<hostname>:~/Downloads$ sudo ./arm-2011.03-42-arm-none-eabi.bin
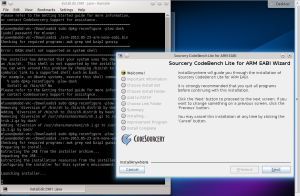
Installation procedure:
Select…
“Next” ⇒
“I accecpt the terms of the Licencse Agreement” ⇒ “Next” ⇒
“Next” ⇒
“Minimal” ⇒ “Next” ⇒
“Choose Install Folder” ⇒ change prefix folder to “/opt/CodeSourcery/Sourcery_G++_Lite“ ⇒ “Next” ⇒
“Modify PATH for current user” ⇒ “Next” ⇒
“Choose Link Folder” ⇒ change prefix folder to “/opt/CodeSourcery/Sourcery_G++_Lite“ ⇒ “Next” ⇒
“Install”
Select “Next” ⇒ “Next”
Installer will be closed automatically now. - Set PATH in home directory ~/.profile
sudo vi ~/.profile
—add at the end of the file—
# set PATH so it includes CodeSourcery bin if it exists
if [ -d “/opt/CodeSourcery/Sourcery_G++/bin” ] ; then
PATH=“/opt/CodeSourcery/Sourcery_G++/bin:$PATH”
fi


Install GNU Arm Eclipse - Manged build extension for GNU ARM Toolchains
http://gnuarmeclipse.livius.net/blog/
- Start Eclipse
KDE ⇒ All applications ⇒ Development ⇒ Eclipse - Add source to Available Software
Eclipse menu: Help ⇒ Install software
Work with: http://gnuarmeclipse.sourceforge.net/updates
Press “Add”
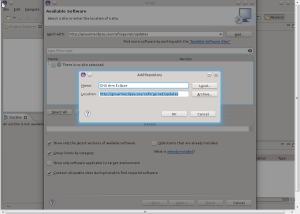
Add Name and Press “OK”
Press “Select All”
Press “Next”
Press “Next”
Select “I accept the terms of the license agreement”
Press “Finish”
“Security Warning” ⇒ Press “OK”
After installation is finished ⇒ “Software Updates” ⇒ Press “Yes” ⇒ Eclipse will be restarted

Installation “VBoxGuestAdditions.iso”
- Right mouse click on CD symbol on tray right bottom corner
- Mark entry “VBoxGuestAdditions.iso”
- Press “Strg-Alt-F1” to leave KDE and start Terminal
cd /media/<username>/VBOXADDITIONS_4.2.12_84980$sudo ./VBoxLinuxAdditions.run
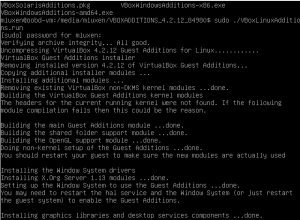
Restart Virtual machine to use the Guest Additions

Mount Shared Folder to Host OS (here: Windows)
sudo mount –t vboxsf V_DRIVE /mnt
Start and Configuration of Eclipse
- Start Eclipse from the KDE-Menu and use/confirm the default workspace directory in your home directory
- Import OOBD firmware project
File ⇒ Import

General ⇒ Existing Projects into Workspace ⇒ Next
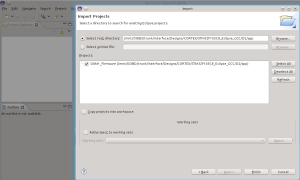
Select Directory where the firmware is located (Hint: SVN checkout) ⇒ Finish
After import of project is finished ⇒ Right click on project “DXM1_Firmware” ⇒ Build Configurations ⇒ Set Active ⇒ Release_STM32
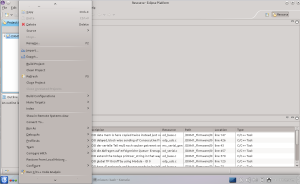
Right click on project “DXM1_Firmware” ⇒ Clean Project (before first build process)
Right click on project “DXM1_Firmware” ⇒ Build Project
If firmware is finished successfully you’ll get a result like:
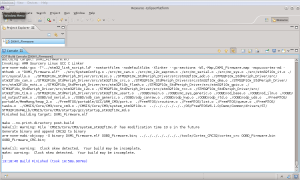
The “OOBD_Firmware_CRC.bin” file is located here…
..\trunk\interface\Designs\CORTEX\STM32F103C8_Eclipse_GCC\D2\app\Release_STM32\


…after the build process is finished.
Off Topic: What Eclipse files to check in with a new project
A small note, copied from http://digitaldumptruck.jotabout.com/?p=767
What Eclipse files to check in with a new project By Michael Portuesi | Published: November 17, 2010
This info is available elsewhere on the net, but I am including it here because I have to look it up every time and I’m tired of it. Check in
.project.classpath.settingsCheck in these files if you wish to share with the rest of the team:.settings/org.eclipse.jdt.ui.prefs– it contains the settings for the import ordering.settings/org.eclipse.jdt.core.prefs– it contains the settings for the compiler version
Do not check in
.metadataIt contains a bunch of state information for your Eclipse workspace, which is changing all the time.
When setting up the project on the new machine use File > Import … > General > Existing Project Into Workspace.
doc/dev_setupfirmware.1393662286.txt.gz · Last modified: 2014/03/01 09:24 by admin